
In this section, I will show you how to config the SSL in Namecheap and AWS EC2.
Preparation
- Buy a domain name
- Buy a SSL certificate
- Generate a key and csr file
- Config the SSL in Namecheap
- Config the SSL in AWS EC2 ubuntu
Buy a domain name
Go to Namecheap and buy a domain name.
Buy a SSL certificate
Go to Dashboard -> SSL Certificates -> Buy SSL Certificates.
Generate a key and csr file
Go to csrgenerator.com and generate a key and csr file. You can use online tools to generate the key and csr file. or the following command in Mac:
|
|
Config the SSL in Namecheap
Go to SSL Certificates page and click “Reissue” or “Issue” in the “SSL Certificates” section. Paste the csr file content into the “CSR” field. Then click “Next” button. Wait for a while, you will see the SSL certificate is ready.

Then, Go to the “Domains List” –> “Manage” –> “Advanced DNS” –> “Manage” –> “SSL Certificates”.

In my case, I config www, www.site as the domain name. The most important thing is to add “CNAME Record” for the domain name. If the domain name abc.xxx.com, the Host ofCNAME Record is should be “_0fxxxd.abc”, if the domian name you want to config is www.xxx.com, the Host ofCNAME Record is should be “_0fxxxd.” Don’t forgot the “.”.
Where to find the CNAME Record
In the “SSL Certificate” section, you can see this page and this is the place to get CNAME Record.


Once you add the CNAME Record, wait for a while, the status of the SSL certificate will be changed from “Pending Validation” to “Verfiy” which me you can see [download] button in SSL Certificates page.

Download the SSL certificate in SSL Certificates page. Last step is to config the SSL in AWS EC2.
Config the SSL in AWS EC2
Log in to EC2. If this is the first time configuring, you’ll need to create a folder yourself to store the SSL files.
|
|
Create three files in this folder: certificate.ca-bundle, certificate.crt, and certificate.key(private key). The command is:
|
|
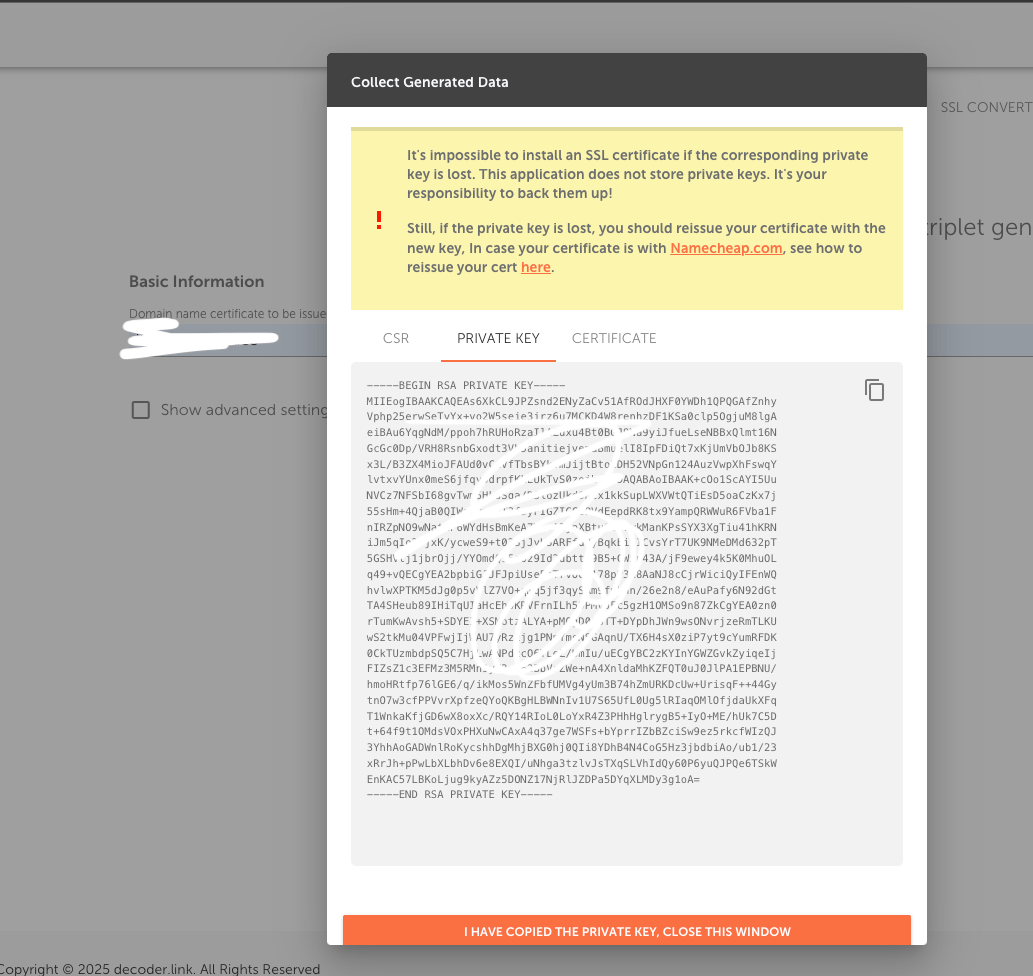
Open the files downloaded from Namecheap using a text editor, copy the corresponding content into the respective files, and save them. You may find that there is no .key file, but in fact, the key file was already generated when you first created the CSR (Certificate Signing Request)’s PRIVATE KEY.
Configure under the apache2 folder
|
|
In 000-default.conf file: ServerName and ServerAlias should be the domain name you want to config. abc is sub domain name of xxx.com.
In my case, I only want to use visit the site by https://abc.xxx.com, so I need to add the following content into the 000-default.conf file.
 1<VirtualHost *:443>
 2ServerAdmin admin@example.com
 3DocumentRoot /var/www/html/forum/public
 4ServerName abc.xxx.com
 5ServerAlias abc.xxx.com
 6
 7<Directory /var/www/html/forum/public/>
 8Options FollowSymLinks
 9AllowOverride All
10Require all granted
11</Directory>
12
13<IfModule mod_rewrite.c>
14RewriteEngine On
15RewriteCond %{HTTP_HOST} !^abc\.xxx\.com$ [NC]
16RewriteRule ^ - [F]
17</IfModule>
18
19SSLEngine on
20RewriteCond %{HTTPS} !=on
21RewriteRule ^/?(.*) https://%{SERVER_NAME}/$1 [R=301,L]
22SSLCertificateFile /etc/ssl/certificate.crt
23SSLCertificateKeyFile /etc/ssl/certificate.key
24SSLCertificateChainFile /etc/ssl/certificate.ca-bundle
25
26</VirtualHost>
“Open the 000-default.conf file. I have already configured it, and you can see that port 443 is pointing to the SSL files that were just downloaded and uploaded to the server. If you need to make changes…”
Last step is to restart the apache2 service.
 1sudo a2enmod ssl
 2sudo a2ensite 000-default.conf
 3sudo apache2ctl configtest
 4
 5sudo systemctl reload apache2
 6
 7// check again --- Verify vhosts
 8
 9sudo apache2ctl -S
10→ should now show both *:80 and *:443.
Now, you can visit the site by https://abc.xxx.com.